

A Teddy bear is a sweet little friend. He is always obliging and happy to lend a helping paw to anyone who needs it. He is a good listener and loves giving bear hugs.

Little Teddy Bear Amigurumi
Pattern by: @ulfetdemir
Picture: @ulfetdemir
Translate by: AmiguWorld
Abbreviations:
R= round
mr = magic ring
sc = single crochet
inc = increase (2 sc in the next stitch)
W = 3 sc in the next stitch
dec = decrease (join the next 2 stitches into 1)
sl st = slip stitch
st = stitch
ch = chain
dc = double crochet
tr = treble crochet
hdc = half double crochet
FO = finish off
BLO = back loop only
FLO = front loop only
[ ] = number of stitches you should have at the end of the round/row
( ) x 6 = repeat whatever is between the brackets the number of times stated
To crochet little teddy bear amigurumi you need:
– Yarn: skin color, pink, blue, white
– Crochet hook
– Fiberfill for stuffing
– Sewing needle and scissors
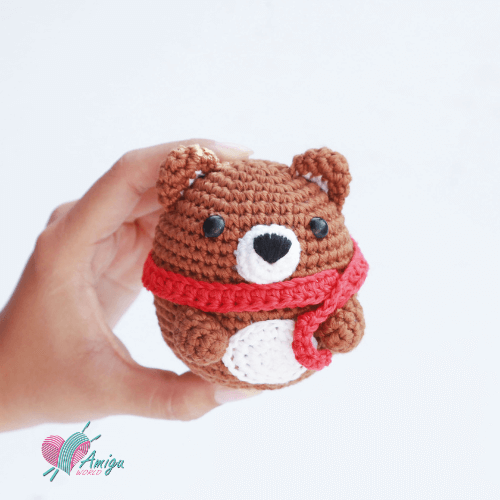
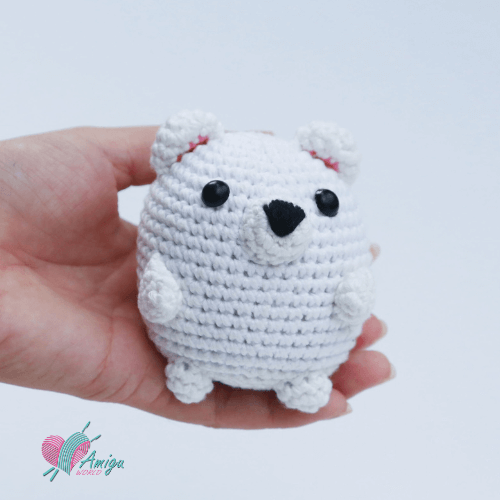
Little Teddy bear amigurumi
Free crochet patterns
![]()
Head
Start with skin yarn
| R 1: 6 sc in mr | [6] |
| R 2: inc x 6 | [12] |
| R 3: (1 sc, inc) x 6 | [18] |
| R 4: (2 sc, inc) x 6 | [24] |
| R 5: (3 sc, inc) x 6 | [30] |
| R 6: (4 sc, inc) x 6 | [36] |
| R 7: (5 sc, inc) x 6 | [42] |
| R 8: (6 sc, inc) x 6 | [48] |
| R 9-19: 48 sc (11 rounds) | [48] |
| R 20: (6 sc, dec) x 6 | [42] |
| R 21: (5 sc, dec) x 6 | 36] |
| R 22: (4 sc, dec) x 6 | [30] |
| R 23: (3 sc, dec) x 6 | [24] |
| R 24: (2 sc, dec) x 6 | [18] |
FO. Stuff with fiberfill. Cut the yarn, leaving a long tail for sewing.
Insert safety eyes (or normal eyes) between round 14 and round 15 at the distance of 7 stitches in between the eyes.
Legs (make 2)
Start with skin yarn
Leg 1
| R 1: 6 sc in mr | [6] |
| R 2: inc x 6 | [12] |
| R 3-23: 12 sc (21 rounds) | [12] |
Leg 2
Make the other leg, don’t cut the yarn. Continue to crochet 4 ch and join leg 1 with sl st.
Continue to crochet the body using the stitches of both legs.

Little Teddy Bear Amigurumi English Free pattern
Body
R1: 12 sc (leg 1), 4 sc (4 stitches of chain), 12 sc (leg 2), 4 sc (4 stitches on another side of chain). [32]
| R 2: 32 sc | [32] |
| R 3-12: inc x 6 (10 rounds) | [32] |
| R 13: (dec, 14 sc) x 2 | [30] |
| R 14: (dec, 13 sc) x 2 | [28] |
| R 15: (dec, 12 sc) x 2 | [26] |
| R 16: (dec, 11 sc) x 2 | [24] |
| R 17: (dec, 10 sc) x 2 | [22] |
| R 18: (dec, 9 sc) x 2 | [20] |
| R 19: (dec, 8 sc) x 2 | [18] |
| R 20-22: 18 sc (3 rounds) | [18] |
FO. Stuff with fiberfill. Cut the yarn, leaving a long tail for sewing.
Arms (make 2)
Start with skin yarn
| R 1: 5 sc in mr | [5] |
| R 2: inc x 5 | [10] |
| R 3-18: 10 sc (16 rounds) | [10] |
FO. Stuff with fiberfill. Cut the yarn, leaving a long tail for sewing.
Ears (make 2)
Start with skin yarn
| R 1: 6 sc in mr | [6] |
| R 2: inc x 6 | [12] |
| R 3: (1 sc, inc) x 6 | [18] |
| R 4-5: 18 sc (2 rounds) | [18] |
| R 6: (dec, 7 sc) x 2 | [16] |
FO. Cut the yarn, leaving a long tail for sewing.
Muzzle
Start with white yarn
| R 1: 6 sc in mr | [6] |
| R 2: inc x 6 | [12] |
| R 3: (1 sc, inc) x 6 | [18] |
| R 4: 18 sc | [18] |
FO. Stuff with fiberfill. Cut the yarn, leaving a long tail for sewing.
Overalls
Trouser leg (make 2)
Make 20 ch, sl sl into the first chain make a circle and continue crocheting.
| R 1-6: 20 sc | [20] |

How to make a trouser
Make the second trouser leg, don’t cut the yarn. Sew two stitches from the 2 legs together.
Continue to crochet the pants using the stitches of both legs.
| R 7-12: 36 sc | [36] |
| R 13: (15 sc, dec) x 2 | [34] |
Straps (make 2)
Make enough chains for straps of overalls. Make sc on the chains. Sl St. Cut the yarn, leaving a long tail for sewing.

How to make two straps for trousers
Bow tie
Make 24 ch. Continue crocheting in turning
R 1-3: 1 ch, 24 sc.
R 4: Crochet along the edge of the bow tie one round with single crochet stitches. And wrap with thread from the middle
Assembly:
– Sew the muzzle to the head. Embroider has a nose and brows (like the picture). The muzzle should be centered between the eyes.
– Sew ears to the head.
– Sew the head to the body.
– Sew arms to the body.
– Sew bow tie between the head and the body.
Congrats! Your little teddy is finished and ready for the photo session!
Thank you for supporting us.
#AmiguWorld

You Might Also Like