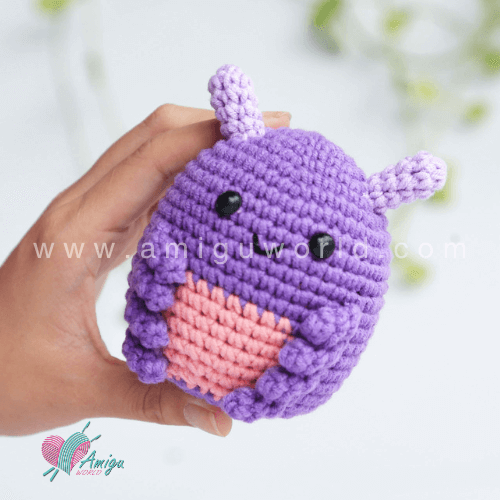
Let the crochet colorful worm amigurumi enchant you! This big worm cute and colorful will appeal to all big and little fans of amigurumi. Make somebody’s day with a such an adorable gift! Follow our step-by-step crochet pattern.
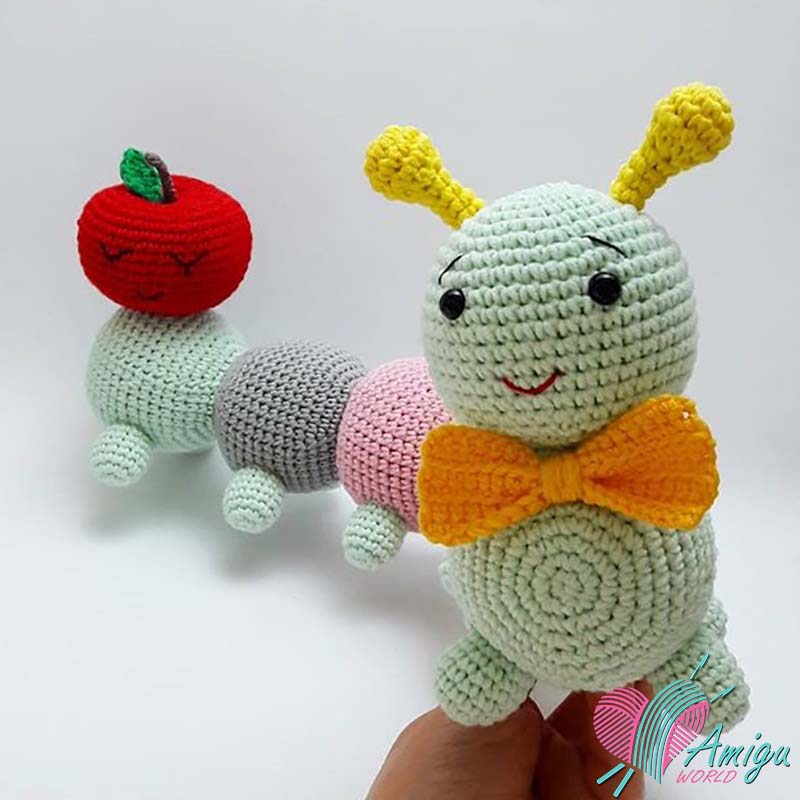
How to crochet a Worm amigurumi pattern
Pattern by: @by.amigurumi
Picture: @ anneyumagi
Translate by: AmiguWorld
Abbreviations:
R= round
mr = magic ring
sc = single crochet
inc = increase (2 sc in the next stitch)
W = 3 sc in the next stitch
dec = decrease (join the next 2 stitches into 1)
sl st = slip stitch
st = stitch
ch = chain
dc = double crochet
tr = treble crochet
hdc = half double crochet
FO = finish off
BLO = back loop only
FLO = front loop only
[ ] = number of stitches you should have at the end of the round/row
( ) x 6 = repeat whatever is between the brackets the number of times stated
To crochet worm amigurumi you need:
– Yarn: blue, pink, orange, yellow, gray
– Crochet hook
– Fiberfill for stuffing
– Sewing needle and scissors
Worm amigurumi
Free crochet patterns
Head
Start with blue yarn
| R 1: 6 sc in mr | [6] |
| R 2: inc x 6 | [12] |
| R 3: (1 sc, inc) x 6 | [18] |
| R 4: (2 sc, inc) x 6 | [24] |
| R 5: (3 sc, inc) x 6 | [30] |
| R 6: (4 sc, inc) x 6 | [36] |
| R 7: (5 sc, inc) x 6 | [42] |
| R 8-16: 42 sc (9 rounds) | [42] |
| R 17: (5 sc, dec) x 6 | [36] |
| R 18: (4 sc, dec) x 6 | [30] |
| R 19: (3 sc, dec) x 6 | [24] |
| R 20: (2 sc, dec) x 6 | [18] |
| R 21: (1 sc, dec) x 6 | [12] |
| R 22: dec x 6 | [6] |
FO. Stuff with fiberfill. Cut the yarn, leaving a long tail for sewing.
Insert safety eyes (or normal eyes) between round 9 and round 10 at the distance of 7 stitches in between the eyes.
Body
Start with blue yarn
| R 1: 6 sc in mr | [6] |
| R 2: inc x 6 | [12] |
| R 3: (1 sc, inc) x 6 | [18] |
| R 4: (2 sc, inc) x 6 | [24] |
| R 5: (3 sc, inc) x 6 | [30] |
| R 6: (4 sc, inc) x 6 | [36] |
| R 7: (5 sc, inc) x 6 | [42] |
| R 8-16: 42 sc (9 rounds) | [42] |
| R 17: (5 sc, dec) x 6 | [36] |
| R 18: (4 sc, dec) x 6 | [30] |
| R 19: (3 sc, dec) x 6 | [24] |
| R 20: (2 sc, dec) x 6 | [18] |
| Change to orange yarn | |
| R 21: (2 sc, inc) x 6 | [24] |
| R 22: (3 sc, inc) x 6 | [30] |
| R 23: (4 sc, inc) x 6 | [36] |
| R 24: (5 sc, inc) x 6 | [42] |
| R 25-33: 42 sc (9 rounds) | [42] |
| R 34: (5 sc, dec) x 6 | [36] |
| R 35: (4 sc, dec) x 6 | [30] |
| R 36: (3 sc, dec) x 6 | [24] |
| R 37: (2 sc, dec) x 6 | [18] |
| Change to yellow yarn | |
| R 38: (2 sc, inc) x 6 | [24] |
| R 39: (3 sc, inc) x 6 | [30] |
| R 40: (4 sc, inc) x 6 | [36] |
| R 41: (5 sc, inc) x 6 | [42] |
| R 42-50: 42 sc (9 rounds) | [42] |
| R 51: (5 sc, dec) x 6 | [36] |
| R 52: (4 sc, dec) x 6 | [30] |
| R 53: (3 sc, dec) x 6 | [24] |
| R 54: (2 sc, dec) x 6 | [18] |
| Change to pink yarn | |
| R 55: (2 sc, inc) x 6 | [24] |
| R 56: (3 sc, inc) x 6 | [30] |
| R 57: (4 sc, inc) x 6 | [36] |
| R 58: (5 sc, inc) x 6 | [42] |
| R 59-67: 42 sc (9 rounds) | [42] |
| R 68: (5 sc, dec) x 6 | [36] |
| R 69: (4 sc, dec) x 6 | [30] |
| R 70: (3 sc, dec) x 6 | [24] |
| R 71: (2 sc, dec) x 6 | [18] |
| Change to gray yarn | |
| R 72: (2 sc, inc) x 6 | [24] |
| R 73: (3 sc, inc) x 6 | [30] |
| R 74: (4 sc, inc) x 6 | [36] |
| R 75: (5 sc, inc) x 6 | [42] |
| R 76-84: 42 sc (9 rounds) | [42] |
| R 85: (5 sc, dec) x 6 | [36] |
| R 86: (4 sc, dec) x 6 | [30] |
| R 87: (3 sc, dec) x 6 | [24] |
| R 88: (2 sc, dec) x 6 | [18] |
| Change to blue yarn | |
| R 89: (2 sc, inc) x 6 | [24] |
| R 90: (3 sc, inc) x 6 | [30] |
| R 91: (4 sc, inc) x 6 | [36] |
| R 92: (5 sc, inc) x 6 | [42] |
| R 93-101: 42 sc (9 rounds) | [42] |
| R 102: (5 sc, dec) x 6 | [36] |
| R 103: (4 sc, dec) x 6 | [30] |
| R 104: (3 sc, dec) x 6 | [24] |
| R 105: (2 sc, dec) x 6 | [18] |
| R 106: (1 sc, dec) x 6 | [12] |
| R 107: dec x 6 | [6] |
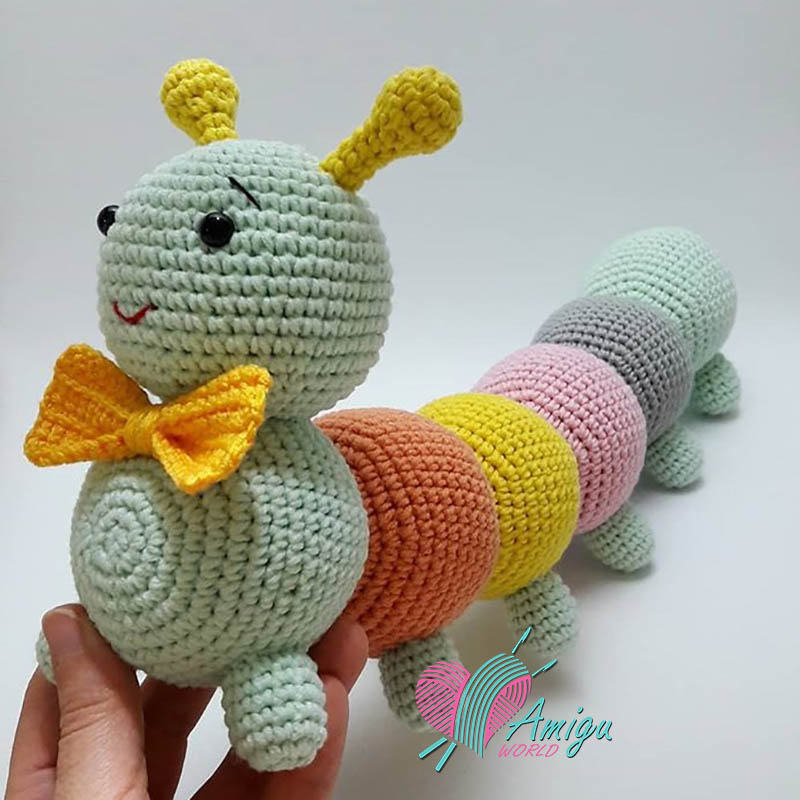
How to crochet a Worm amigurumi pattern
Horn (make 2)
Start with yellow yarn
| R 1: 6 sc in mr | [6] |
| R 2: inc x 6 | [12] |
| R 3-4: 12 sc (2 rounds) | [12] |
| R 5: dec x 6 | [6] |
| R 6-9: 6 sc (4 rounds) | [6] |
FO. Stuff with fiberfill. Cut the yarn, leaving a long tail for sewing.
Legs (make 12)
Start with blue yarn
| R 1: 6 sc in mr | [6] |
| R 2: inc x 6 | [12] |
| R 3: (5 sc, inc) x 2 | [14] |
| R 4-8: 14 sc (5 rounds) | [14] |
FO. Stuff with fiberfill. Cut the yarn, leaving a long tail for sewing.
Assembly:
- Sew two horns to the head.
- Sew the head to the body.
- Sew the legs on the sides of the body.
Congrats! Your worm amigurumi is finished!
Thank you for supporting us.
#AmiguWorld


